
Create a DIY Rock Water Feature for Your Backyard
The soft, melodic trickle of water. The rustic charm of natural stones. The allure of a handcrafted oasis, built with your own two hands. A DIY rock water feature infuses your backyard with serenity and charm, blending nature’s beauty with your personal creativity. Best of all, building one is easier than you think—no landscape architect needed. Whether you’re creating a petite patio fountain or a bold, cascading rock waterfall, this guide lays out everything you need to get started.
Types of DIY Rock Water Features
From compact tabletop fountains to nature-inspired rock ponds, there’s a DIY rock water feature for every space and style. Here are some popular options to spark your creativity:
| Type | Best For | Key Features |
| DIY Small Rock Water Feature | Patios, balconies, tiny gardens | Compact, simple setup, great for small spaces |
| DIY Drilled Rock Water Feature | Zen gardens, modern landscapes | Water trickles through a drilled rock, minimal maintenance |
| Stacked Rock Fountain | Garden corners, entryways | Elegant design, soothing water flow |
| Homemade Pond with Rock Waterfall | Large backyards, nature-inspired spaces | Natural-looking, supports fish & plants |
| Tabletop Rock Water Feature | Indoors, decks, small patios | Portable, easy to maintain |
DIY Small Rock Water Feature
Compact and charming, small rock water features are perfect for patios, balconies, or pocket gardens. Their size makes them budget-friendly and simple to maintain while adding a delightful ambiance to any outdoor nook.
DIY Drilled Rock Water Feature
With water bubbling effortlessly from a single drilled rock, this design exudes modern simplicity. Perfect for Zen gardens or contemporary landscapes, drilled rock features are low-maintenance, with minimal water loss.
Stacked Rock Fountain
A classic choice, stacked rock fountains combine elegance with tranquility. By carefully balancing stones, you create a multi-tiered cascade, producing a gentle, calming sound that resonates throughout your garden.
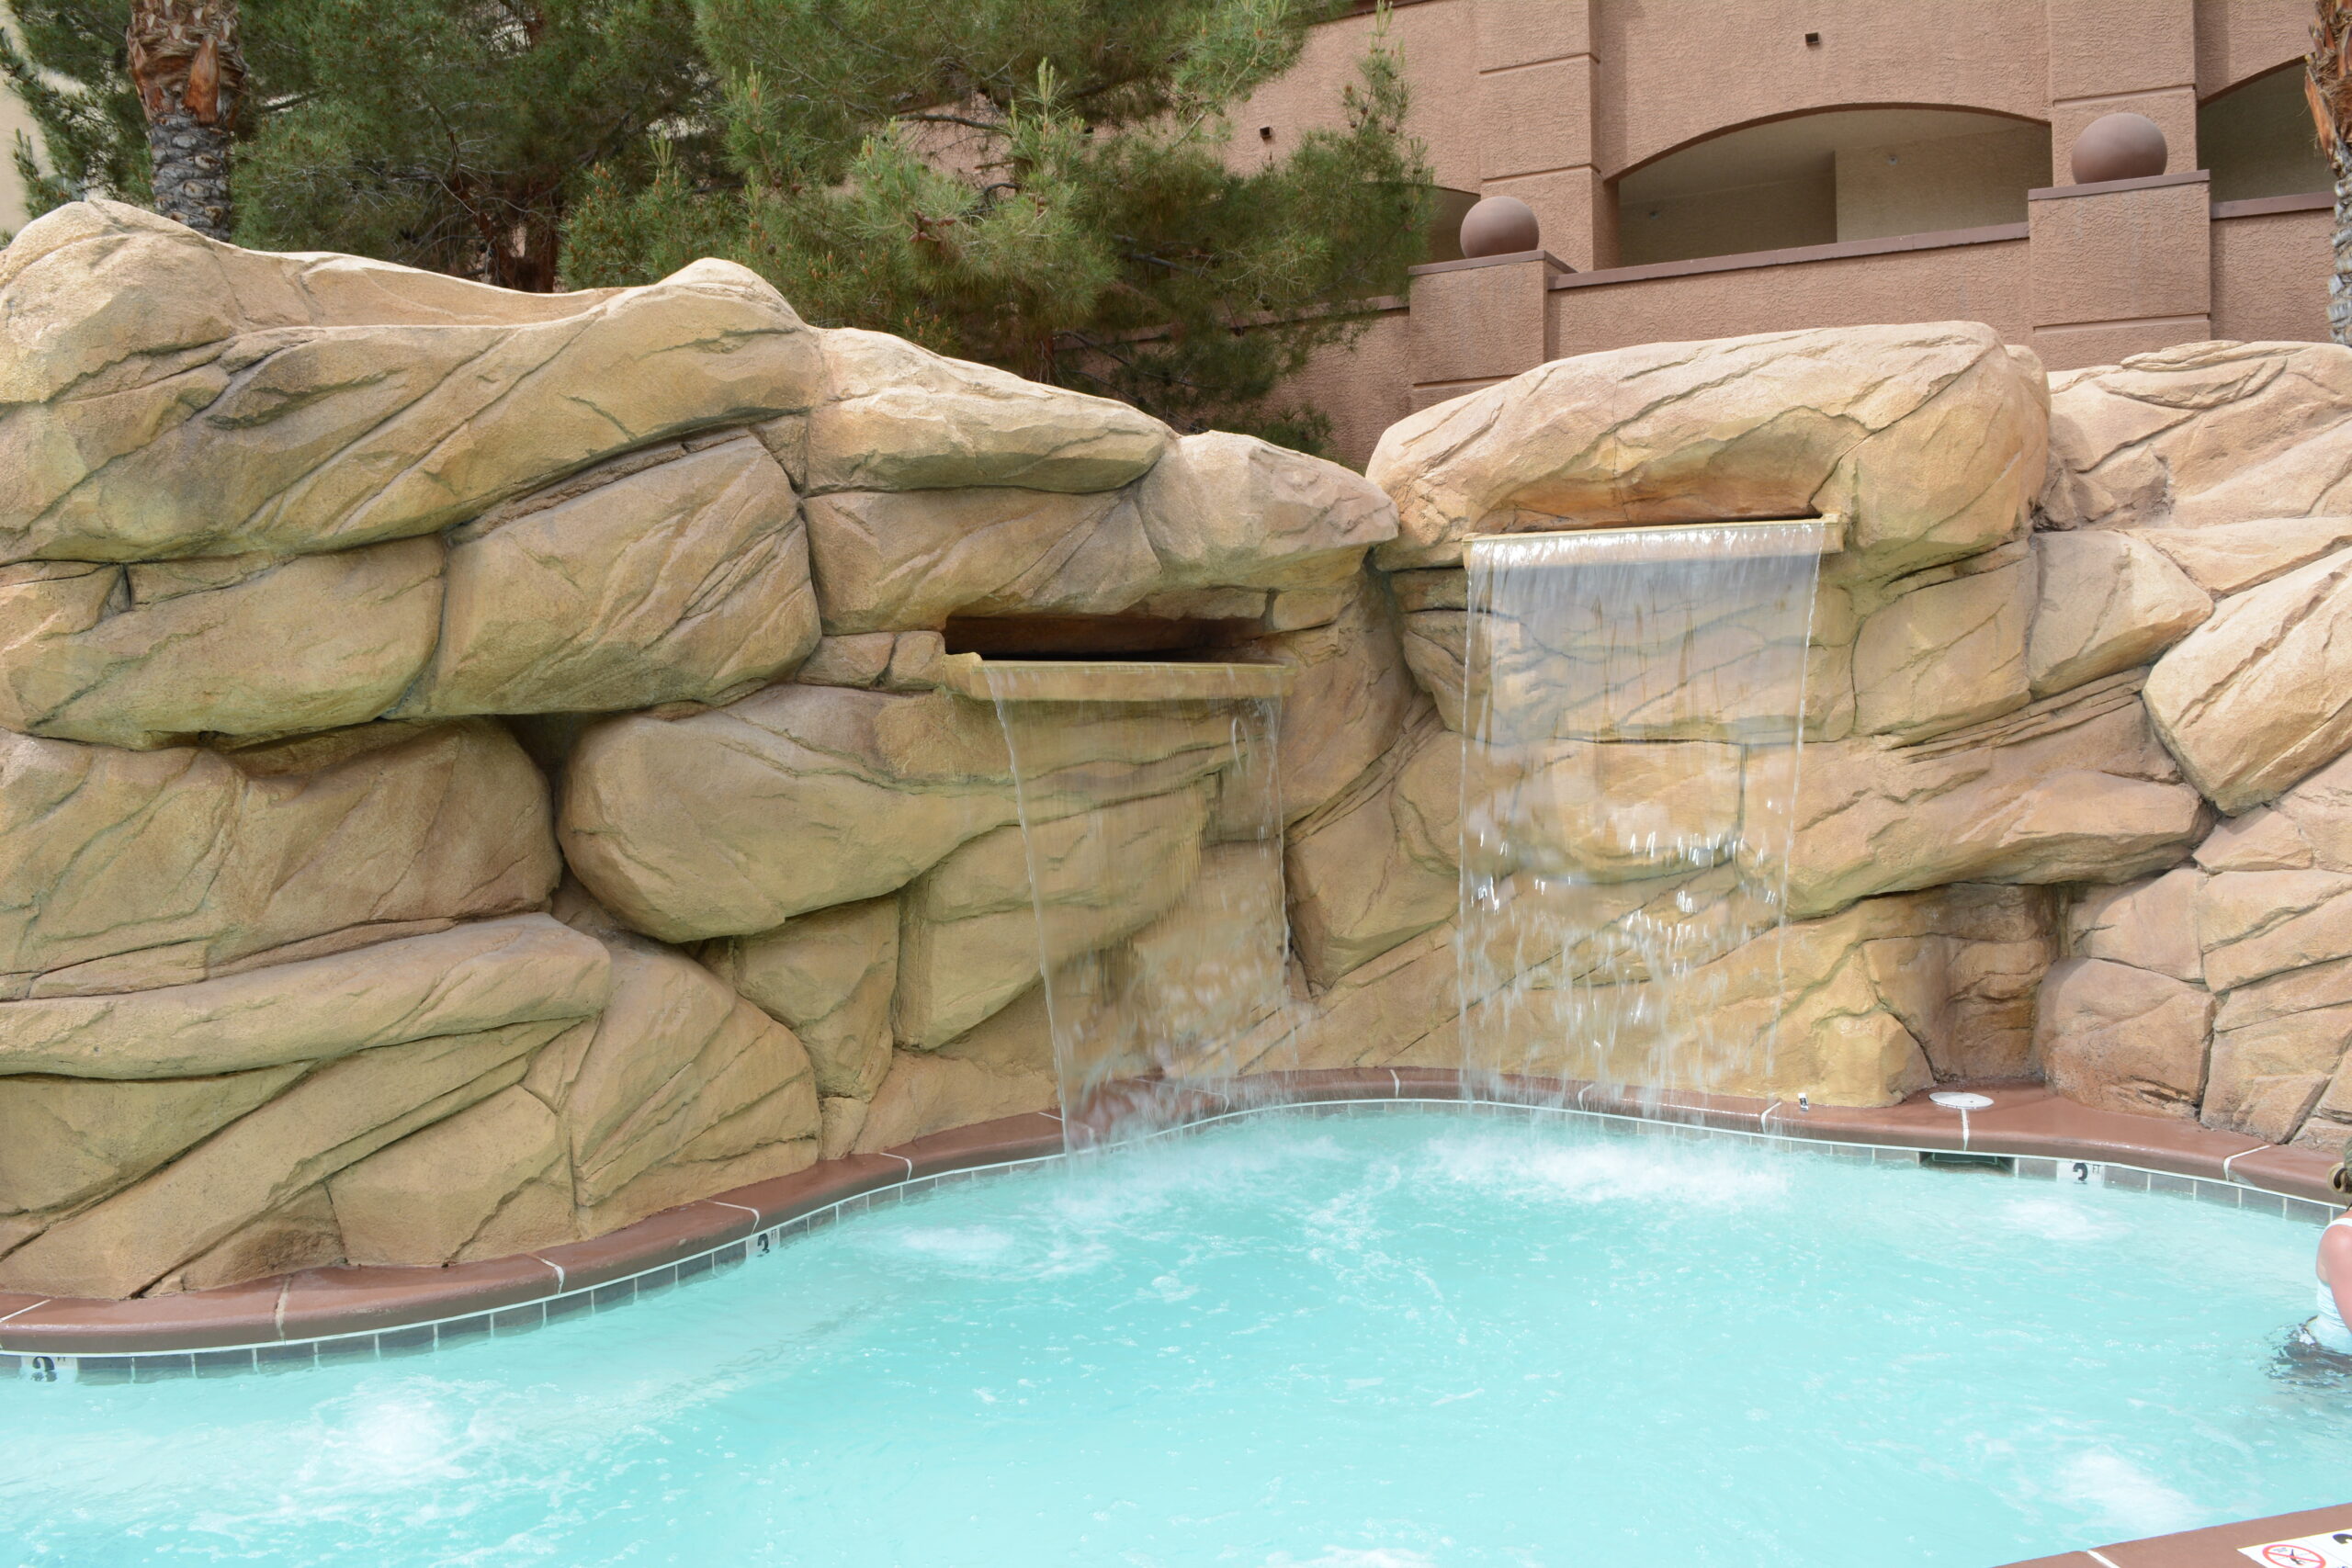
Homemade Pond with Rock Waterfall
Go big with a pond and cascading rock waterfall. This nature-inspired feature provides a home for fish, frogs, and aquatic plants while delivering the soothing sights and sounds of a babbling brook.
Tabletop Rock Water Feature
Short on space? A tabletop water feature offers all the charm in a compact package. Ideal for decks, balconies, or even indoor use, these mini fountains bring the essence of nature to any corner of your home.
Materials Needed for a DIY Rock Water Feature
Gather your tools and supplies. The right materials are essential for building a durable, visually appealing water feature:
✔️ Rocks or stones: Choose river rock, slate, basalt, or limestone for texture and color variety.
✔️ Water pump: A submersible pump keeps water circulating smoothly.
✔️ Tub or reservoir: A sturdy container to hold water (bucket, basin, or pre-formed pond liner).
✔️ Plastic tubing: Connects the pump to the water outlet.
✔️ Drill (if needed): For drilled rock features, use a masonry drill bit.
✔️ Pebbles & decorative elements: Enhance the natural look with small stones, moss, or aquatic plants.
Step-by-Step Guide: How to Build a DIY Rock Water Feature
1️⃣ Choose the Right Location
- 📍 Pick a flat, stable surface in your garden, patio, or backyard.
- Ensure access to electricity for the water pump.
- Consider visibility—place it where you can enjoy the sight and sound of flowing water from your favorite relaxation spot.
2️⃣ Select & Arrange Your Rocks
- 🪨 Choose rocks that complement your outdoor style—river rocks for a soft, natural look or basalt for bold, modern vibes.
- Arrange rocks to create a natural water path. For cascading designs, stack stones carefully to form tiers.
- Leave space for the pump and tubing while maintaining a natural appearance.
3️⃣ Set Up the Water Pump & Tubing
- 💧 Place the submersible pump inside your water reservoir.
- Attach the plastic tubing to the pump outlet.
- Thread the tubing through gaps between rocks or through a drilled rock to create your water feature’s flow point.
- Ensure the tubing is fully concealed beneath stones for a seamless look.
4️⃣ (Optional) Drill a Hole Through the Rock
- 🛠️ For a drilled rock water feature, use a masonry drill bit to create a central hole.
- Thread the tubing through the drilled hole, allowing water to cascade from the stone’s surface.
- Secure the tubing inside the rock to prevent shifting during operation.
5️⃣ Assemble the Feature & Test the Water Flow
- ⚙️ Arrange the rocks around the tubing and reservoir to conceal mechanical components.
- Add smaller stones and pebbles to fill gaps and enhance natural aesthetics.
- Turn on the pump and observe the water flow. Adjust rock placements to perfect the cascade and eliminate splashing.
6️⃣ Add Finishing Touches
- 🌿 Surround your water feature with potted plants, moss, or creeping ground cover to blend it into your garden.
- Place LED lights beneath the water or around the feature for evening ambiance.
- Scatter decorative pebbles and shells around the base for added charm.
Tips for Maintaining Your DIY Rock Water Feature
✔️ Keep water clean: Remove fallen leaves and debris regularly. Top off water levels to account for evaporation.
✔️ Check the pump regularly: Clean the filter monthly to prevent clogging and ensure smooth operation.
✔️ Use natural algae control: Add aquatic plants like water lettuce or barley straw to keep algae in check.
✔️ Winterize in cold climates: In freezing regions, drain the feature and store the pump indoors to prevent ice damage.
✔️ Inspect rocks and tubing: Tighten loose stones and replace worn-out tubing to maintain the feature’s integrity.
Start Your DIY Rock Water Feature Project Today!
A DIY rock water feature is more than a garden addition—it’s an expression of creativity and a source of peace. Whether you choose a small rock fountain for your patio or a grand pond with a cascading waterfall, the satisfaction of building it yourself is unparalleled.
🌿 Gather your materials. Find your spot. Unleash your imagination. Transform your backyard into a haven of tranquility, one stone at a time.
Frequently Asked Questions (FAQs)
How to turn a rock into a water feature?
Drill a hole through a large rock with a masonry bit, insert a water pump tube through the hole, and place the pump in a hidden reservoir beneath. Water will flow up and over the rock’s surface, creating a serene, bubbling effect.
Can you make your own water feature?
Absolutely! With basic tools and materials—rocks, a submersible pump, and a reservoir—you can build a beautiful homemade rock water feature tailored to your style and space.
What is the best material for a water feature?
River rock, slate, and basalt are excellent choices. They’re durable, weather-resistant, and blend beautifully with natural landscapes. For reservoirs, sturdy plastic liners or basins work best.
Can I put stones in my water feature?
Yes, stones not only enhance aesthetics but also help direct water flow. Use smooth river rocks for a polished look and larger, textured stones for structural support.
What rocks should not be put in water?
Avoid porous or reactive rocks like limestone if you’re keeping fish, as they can alter water pH. Also, steer clear of painted or dyed stones, which may leach harmful chemicals.
Building a DIY rock water feature brings together artistry, nature, and tranquility. It transforms ordinary spaces into sanctuaries and rewards you with the soothing melody of flowing water. More than a backyard upgrade, it’s a celebration of craftsmanship—yours. So, why wait? Grab your stones, start stacking, and let nature’s symphony flow. 🌿💧🏡


Leave a Reply
Your email is safe with us.